
Shader Graph Tutorials: Hologram Shader
You can create nice visual effects with Shader Graph. As an example, in this tutorial, we will learn how we can create a hologram shader using Shader Graph in Unity3D. If you are not familiar with Shader Graph, you can follow this link to see our Shader Graph Tutorials from scratch. And also you can download the model Robot Kyle which is used in this tutorial from this link.
The hologram effect is a widely used effect in Sci-Fi movies and games. At the end of the tutorial, we will obtain the following hologram shader:
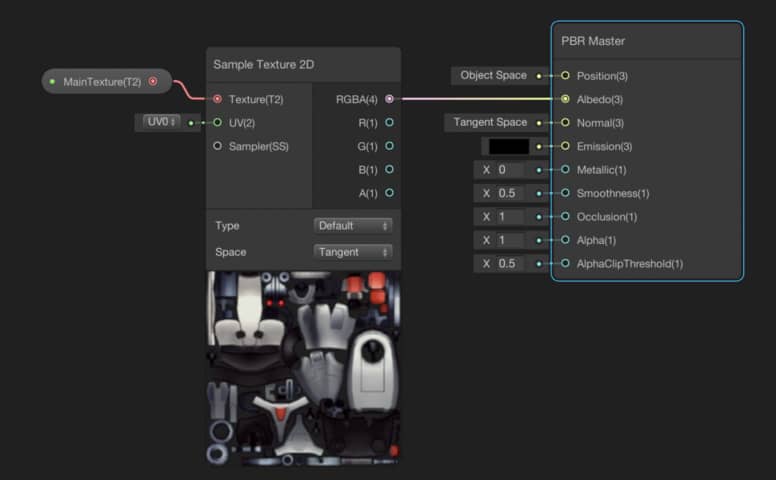
Let’s start by adding the main texture and mapping it to the model. We have already seen how texture mapping works in this tutorial.
The Flicker Effect for Hologram Shader
We can create a flicker effect by setting the alpha value to 0 at random time intervals, and therefore the object will be transparent completely for a short period of time. To create this effect, we will use a Time Node, a Random Range Node, a Comparison Node, and a Branch Node. We will use the Time Node as the seed of the Random Range Node, therefore in every frame, a new random number will be generated. We can compare this random number by another number. If the generated random number is smaller than the compared number, we will set the alpha to the 1, otherwise 0. For instance, assume that we compare the generated random number with 0.7. This means that alpha value will be 1 in 70% of the time and will be 0 in 30% of the time. To control the flicker frequency from the outside of the shader, add a FlickerFrequency Property and set its value between 0 and 1. Connect the output of the branch node to the alpha port of the PBR Master Node.
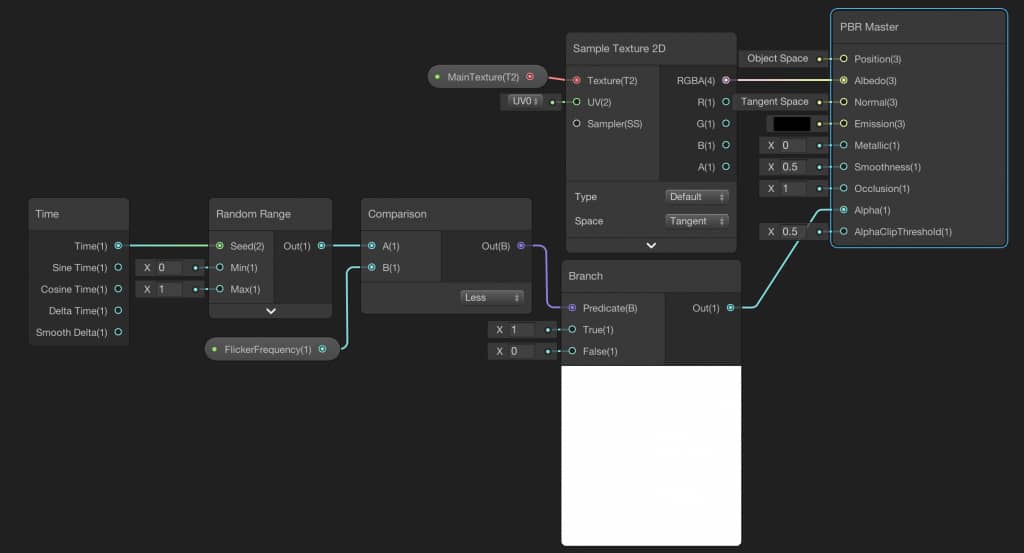
You have to change the Surface Type to Transparent from the gear icon on the top of the PBR Master Node. Changing alpha value is meaningless while we are working on an opaque surface.
You should see something like the image below. You should observe that also, changing FlickerFrequency, changes the visibility of the object in time.
The Scrolling Transparency
In order to create a scrolling transparency effect, we need a hologram mask texture. We are going to use the following texture as the hologram mask.

We will use this texture for masking purposes. In other words, we will map this texture to our model, then set the alpha value of the corresponding pixels according to texture value. For instance, the value of a pure white pixel is 1 and the value of a pure black pixel is 0. If we map the mask texture to our model and set the alpha value using this mapping, we obtain opaque, transparent and semi-transparent pixels which correspond to mapping.

We obtained the following image.
Nevertheless, it is looking weird. The reason for this weird looking is we mapped our texture according to object space. But what we would like to obtain is mapping the texture according to our point of view, ie. camera’s point of view. This vector space is called View Space. In order to map our texture according to view space, we need to add a Tiling and Offset Node and a Position Node. We also need to set the Space property of the Position Node to View.
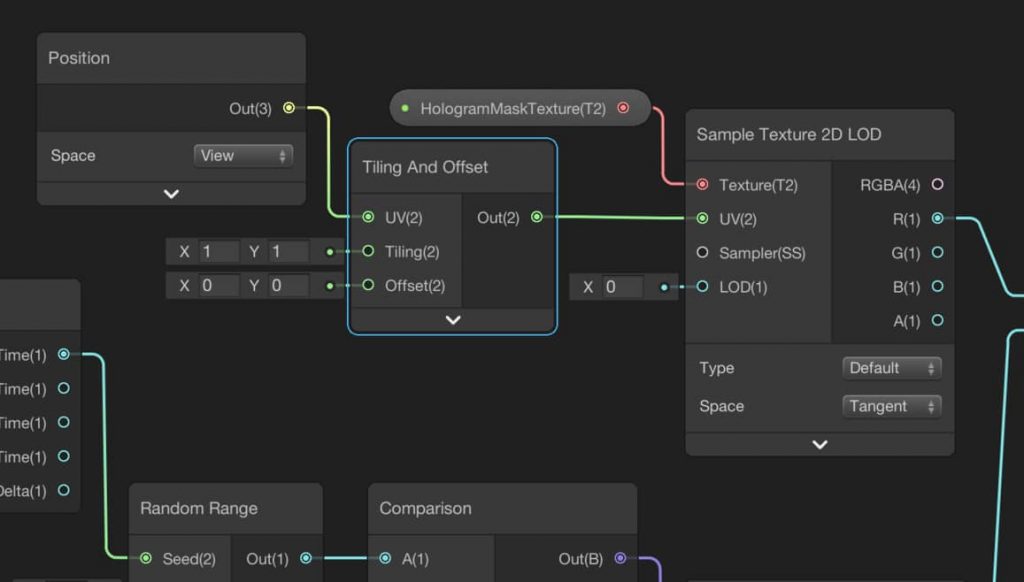
Hence, we get the following:
Now, it is time to create scrolling transparency effect. To do this, we will connect the Time Node to Offset port of the Tiling and Offset Node. But it is a good idea to locate a Multiply Node between them in order to control the scrolling speed.
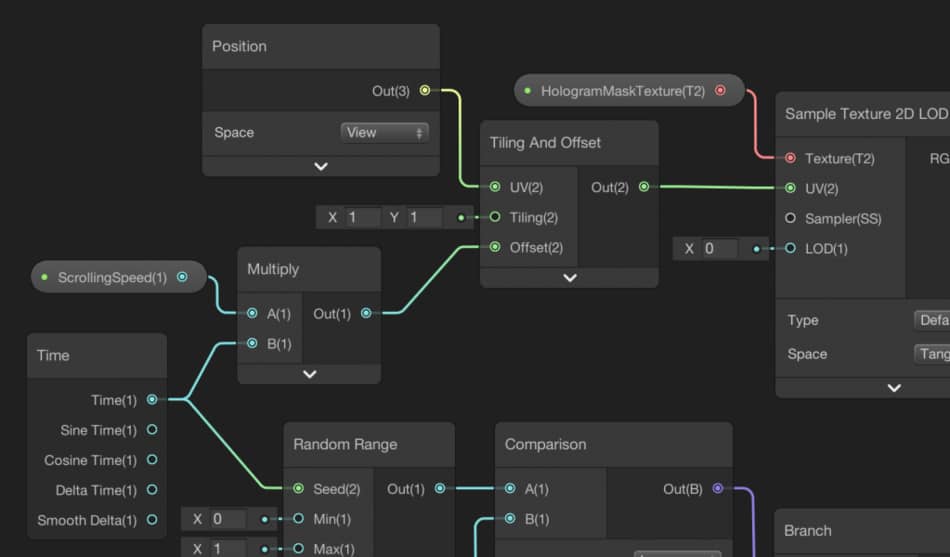
This is the final result:
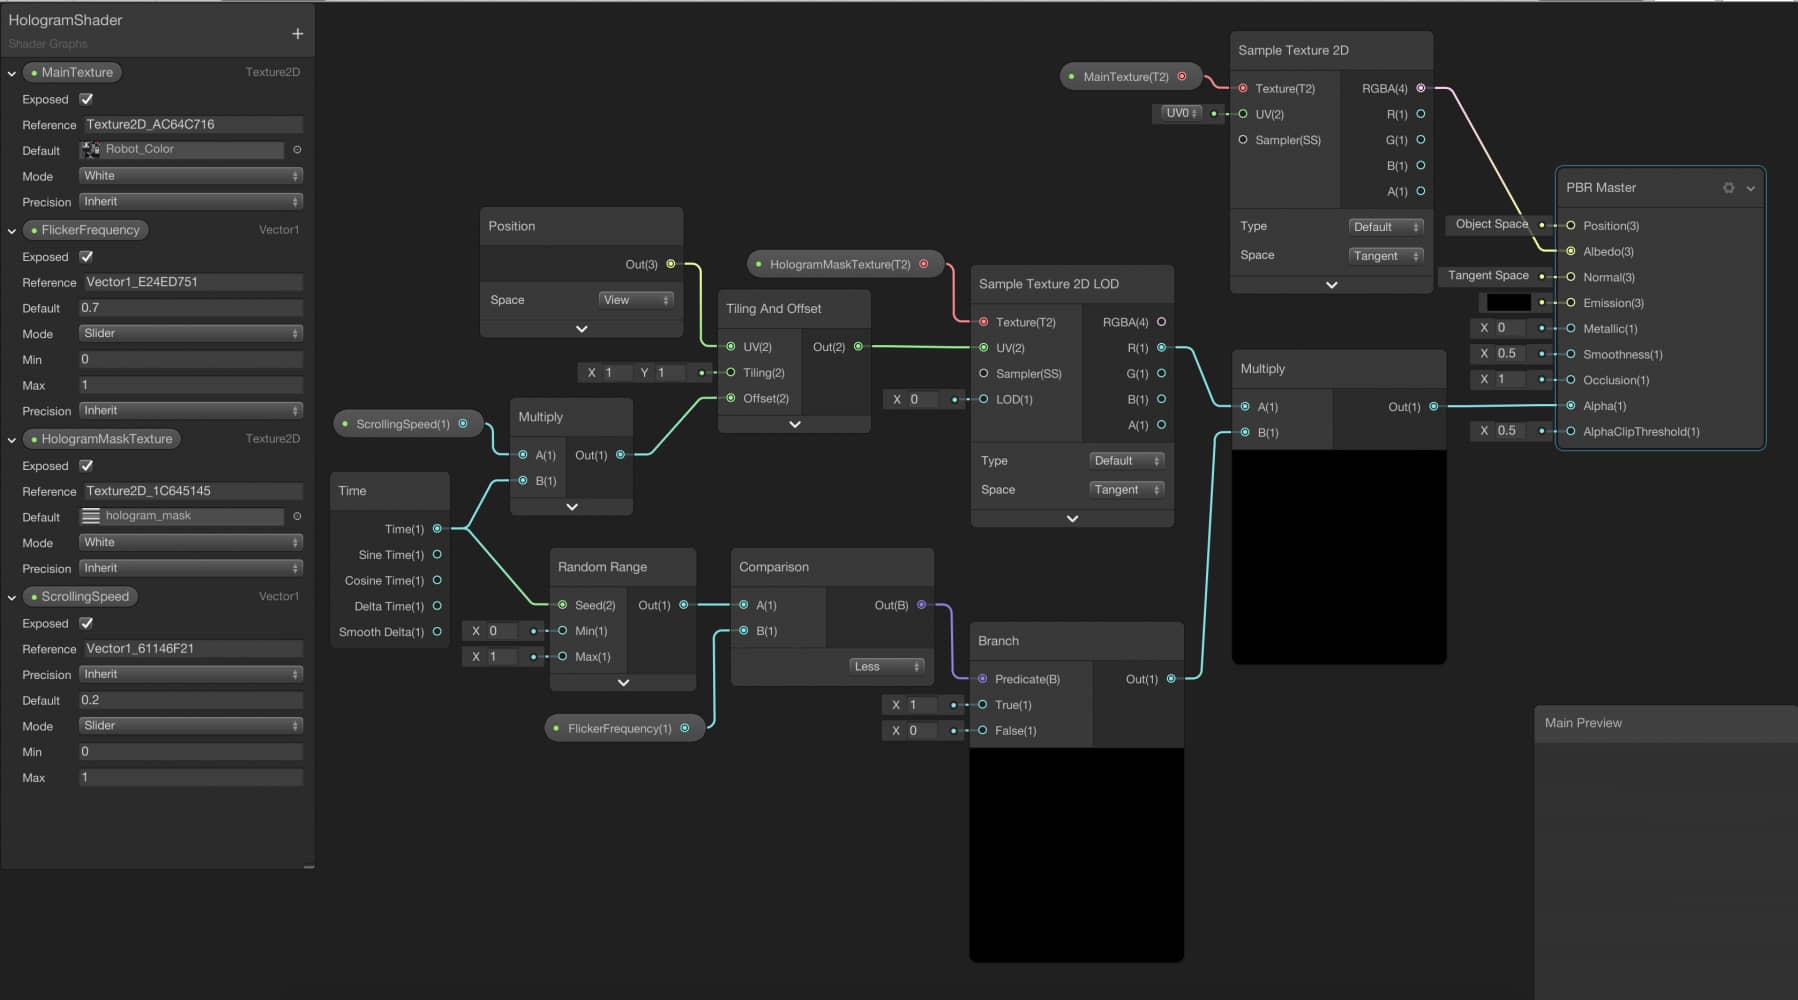
And this is the final graph of our Hologram Shader:
Just a heads-up for anyone else who struggled to get the texture scrolling. In order to make it work you need to set the texture “Wrap Mode” to repeat in the import settings.
Hi, thank you for feedback. I am going to add this information to the tutorial also.