
Visualizing the Trajectory of a Bouncing Object in Unity3D
In this article, we are going to see how we can calculate, simulate and visualize the trajectory of a bouncing object in Unity3D. We are going to see two different methods. The first one is by solving kinematics equations directly. And the second method is by simulating the motions before the actual motion starts. While the first method does not allow us to determine the trajectories after collisions, the second method gives us a powerful tool to find how the objects will behave after the collision.
Actually, we can also determine the trajectories of rigid bodies after collisions by using the first method but it will be too complex since we need to take into consideration other physical concepts like force, energy, and momentum. This kind of study is out of the scope of this article. Nevertheless, it may be a good idea to learn the mathematics and physics behind the motion for a game developer.
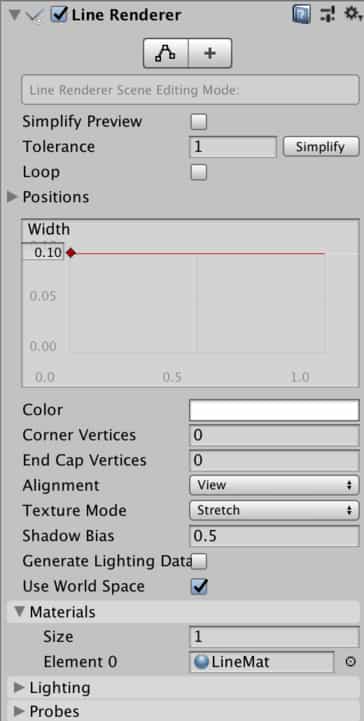
In addition, in this article, to visualize the trajectory, we will use the Line Renderer component. If you are not familiar with the Line Renderer component, you can read our Line Renderer tutorial.
Trajectory Calculations for Projectile Motion
In order to see how we use the equations of motion in game development, a study on the projectile motion is very informative. For this reason, we are going to study it in this part of the article.
To determine the trajectory of an object during projectile motion, we use kinematic equations. We can find the instantaneous position, velocity, and acceleration of the object during the motion using kinematic equations. In addition to this, we can also calculate flight time, maximum height or range. Kinematic equations are given by the following identities:
\({\large \vec{v}=\vec{a}t+\vec{v}_{0}}\) [1]
\( {\large \vec{r}=\vec{r}_{0}+\vec{v}_{0}+\frac{1}{2}\vec{a}t^2}\) [2]
In these equations v, r and a represent velocity, position and acceleration vectors, respectively and zero indices indicate initial values. In 3D space, vectors consist of three values which indicate the components along x, y, and z axes. You can calculate the position of the object in each direction separately and then combine them to construct a position vector. Or you can find instantaneous velocities of the object in each direction and again combine them to obtain a velocity vector. If you are making these calculations by hand, this way(separating the components) can prevent complexity. On the other hand, here all the calculations will be made by CPU and therefore we do not have to separate them. Calculating all the components independently will increase the number of rows of the code which we will write.
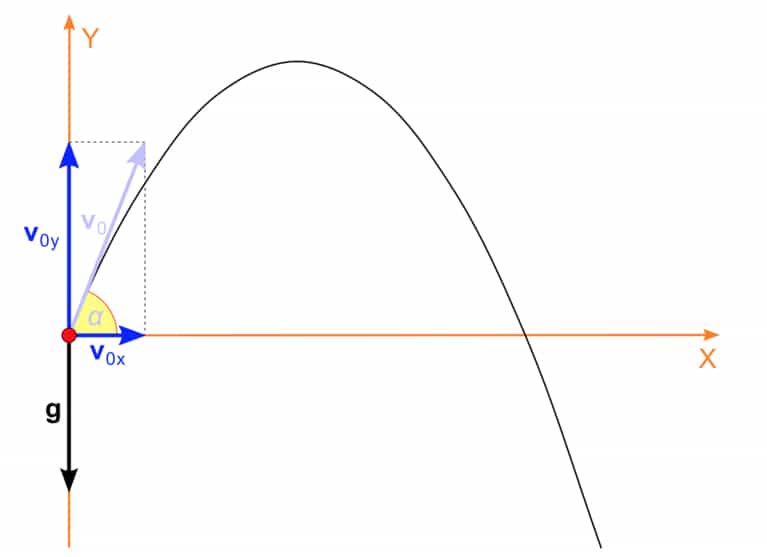
First of all, we need flight time. We can calculate half of the flight time by determining the time in which the object reaches its maximum height. To determine this time we can use the first equation. When the object reaches its maximum height, the velocity in the y-direction is zero. Since we know the initial velocity in the y-direction, this time will be \(\frac{-v_{0y}}{g}\). And the total flight time will be \(\frac{-2v_{0y}}{g}\). (Here, g is the gravitational acceleration).
            //Time of flight calculation

            float t;
            t = (-1f * initalVelocity.y) / Physics.gravity.y;
            t = 2f * t;
Now, we can set the resolution of the curve and also determine the intervals of the point which the object will pass. For instance, assume that the time of flight is 10 seconds. In order to determine the trajectory, we need to find the positions during the flight. Getting every point on this trajectory is not practical, therefore we may find the position of the object for every second and connect these points to visualize the trajectory. If you would like to get a more accurate trajectory calculation, you can increase the resolution of the curve. In other words, you can set the resolution to 100 points instead of 10. This time you will get the positions for every 0.1 seconds.
After determining the times in which the position of the object will be calculated, it is easy to calculate them using the second equation above.
            //Trajectory calculation

            lineRenderer.positionCount = 100;
            Vector3 trajectoryPoint;

            for (int i = 0; i < lineRenderer.positionCount; i++)
            {
                //
                float time = t * i / (float)(lineRenderer.positionCount);
                trajectoryPoint = transform.position + initalVelocity * time + 0.5f * Physics.gravity * time * time;
                lineRenderer.SetPosition(i, trajectoryPoint);
            }
We would like to visualize the trajectory of the object when the left mouse button is pressed down and throw it when the left mouse button is released. In addition, if we would like to remove the trajectory after the motion, we can do this by setting the number of points of line renderer to 0. It is a good idea to do that after a collision. Full code should look like this:
using System.Collections;
using System.Collections.Generic;
using UnityEngine;

[RequireComponent(typeof(Rigidbody), typeof(LineRenderer))]
public class TrajectoryRenderer : MonoBehaviour
{
    public Vector3 initalVelocity;
    LineRenderer lineRenderer;
    Rigidbody rb;

    void Start()
    {
        rb = GetComponent<Rigidbody>();
        lineRenderer = GetComponent<LineRenderer>();
    }

	private void FixedUpdate()
	{
        if(Input.GetMouseButtonDown(0)){

            //Time of flight calculation

            float t;
            t = (-1f * initalVelocity.y) / Physics.gravity.y;
            t = 2f * t;

            //Trajectory calculation

            lineRenderer.positionCount = 100;
            Vector3 trajectoryPoint;

            for (int i = 0; i < lineRenderer.positionCount; i++)
            {
                //
                float time = t * i / (float)(lineRenderer.positionCount);
                trajectoryPoint = transform.position + initalVelocity * time + 0.5f * Physics.gravity * time * time;
                lineRenderer.SetPosition(i, trajectoryPoint);
            }
        }
        if(Input.GetMouseButtonUp(0)){
            rb.velocity = initalVelocity;
        }
	}

    private void OnCollisionEnter(Collision collision)
    {
        lineRenderer.positionCount = 0;
    }
}
We have to add this script to the object that we will throw. We also have to set the initial velocity, create a line material and associate it with our line renderer and also check that the line renderer will render the lines in world positions.
Simulating the Motion of the Object Before the Movement
In the past, simulating the motion of an object behind the scenes. The only thing which you could do is creating unrendered copies of actual objects and simulating the movement of them in realtime. Nevertheless, since the motions of the objects are simulated in realtime, you had to wait for the end of the movement to see it completely. For example, if the movement continues for 10 seconds, you had to wait 10 seconds to see the complete trajectory. This is neither easy nor practical. As of Unity 2018(I think as of 2018.3 but I am not sure about it), you can create multiple scenes in addition to the actual scene, and simulate everything in these scenes. The actual objects will not be affected by the simulations.
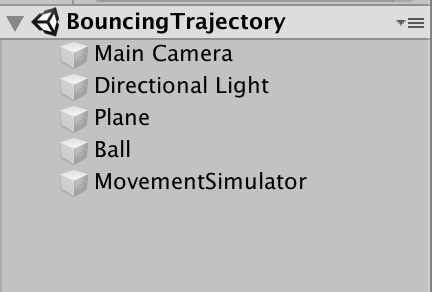
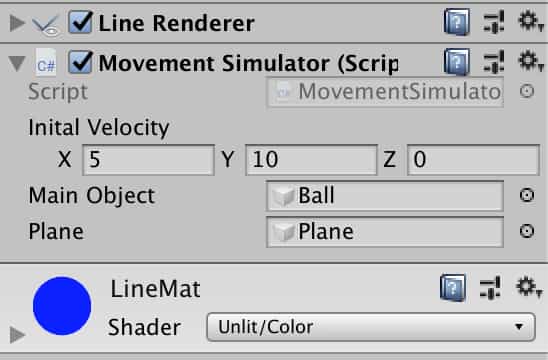
Create a new empty game object and add a new script and change its name to “MovementSimulator”(You should also remove the script which we created in the last part, if it is added to the object). In addition, add a line renderer component to this new game object.
In order to create a new scene inside our scene, we need to import the SceneManagement class.
using System.Collections;
using System.Collections.Generic;
using UnityEngine;
using UnityEngine.SceneManagement;
Our aim is to create a new scene inside our scene and simulate all rigidbody motions in the new scene. We are going to create this new scene at the beginning of the scene. Also, we need to get the physics of this new scene. Therefore, we have to declare a physics scene that will be associated with the new scene.
To create a new scene, we have to use SceneManager.CreateScene() method. Here, the first parameter is the name of the new scene and the second parameter is the physics parameters that will be associated with the scene. To get the physics of this scene we use GetPhysicsScene() method as seen below.
public class MovementSimulator : MonoBehaviour
{
    private Scene parallelScene;
    private PhysicsScene parallelPhysicsScene;

    void Start()
    {
        CreateSceneParameters createSceneParameters = new CreateSceneParameters(LocalPhysicsMode.Physics3D);
        parallelScene = SceneManager.CreateScene("ParallelScene", createSceneParameters);
        parallelPhysicsScene = parallelScene.GetPhysicsScene();
    }
}
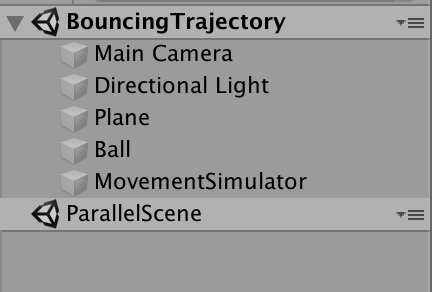
If we run this scene, we will see that a new scene is created. Using this method, we can create multiple scenes.
We are going to create copies of the interacting objects in ParallelScene. In our scene, a plane and a ball will interact. Additionally, I also get Line Renderer to draw the trajectory. 1000 points are enough for our purpose.
public class MovementSimulator : MonoBehaviour
{
    private Scene parallelScene;
    private PhysicsScene parallelPhysicsScene;

    public Vector3 initalVelocity;
    public GameObject mainObject;
    public GameObject plane;
    private LineRenderer lineRenderer;

    void Start()
    {
        Physics.autoSimulation = false;
        lineRenderer = GetComponent<LineRenderer>();
        lineRenderer.positionCount = 1000;

        CreateSceneParameters createSceneParameters = new CreateSceneParameters(LocalPhysicsMode.Physics3D);
        parallelScene = SceneManager.CreateScene("ParallelScene", createSceneParameters);
        parallelPhysicsScene = parallelScene.GetPhysicsScene();
    }
}
In the script above, we disabled auto simulation by setting Physics.autoSimulation as false. This is because we want to perform simulation in our control. We will see how we can do this in a minute.
When we press the left mouse button down, we will perform a simulation in the parallel scene and when the left mouse button up, we will run the actual motion. Let’s create a method that controls the simulation in the parallel scene(Look at the code below). In this method, we create copies of the objects in the main scene using Instantiate() method. Since we want to simulate them in the parallel scene, we have to move them there. Hence, during the simulation actual objects will not be affected.
When we create copies of the real objects, copies are created with the same rotation and position with the real objects. On the other hand, linear and angular velocities of copies are zero. If all the objects are steady, we do not have to give them an initial velocity. But if the objects are moving, then we have to pass linear and angular velocity to simulation objects.
Up to now, we created copies of real objects, move them to the simulation scene and finally give them linear and angular velocities. Now, we are going to simulate the motion. To simulate motion, we are going to use a for loop. In every loop, we simulate only one step and add the position of the object to the line renderer. To perform simulation we use PhysicsScene.Simulate() method. This method takes a parameter that specifies the intervals of the steps in seconds. Since physics calculations in the real scene are performed in Time.fixedDeltaTime steps, we have to put this time as the parameter of PhysicsScene.Simulate() method.
Finally, we should destroy or deactivate the simulation objects. But I suggest you run the method at least one time without destroying them to see what is going on.
    void SimulatePhysics()
    {
        GameObject simulationObject = Instantiate(mainObject);
        GameObject simulationPlane = Instantiate(plane);

        SceneManager.MoveGameObjectToScene(simulationObject, parallelScene);
        SceneManager.MoveGameObjectToScene(simulationPlane, parallelScene);

        simulationObject.GetComponent<Rigidbody>().velocity = mainObject.GetComponent<Rigidbody>().velocity + initalVelocity;
        simulationObject.GetComponent<Rigidbody>().angularVelocity = mainObject.GetComponent<Rigidbody>().angularVelocity;
        for (int i = 0; i < lineRenderer.positionCount; i++)
        {
            parallelPhysicsScene.Simulate(Time.fixedDeltaTime);
            lineRenderer.SetPosition(i, simulationObject.transform.position);
        }
        Destroy(simulationObject);
        Destroy(simulationPlane);
    }
Let’s create a new method that will start the motion in the real scene.
    void Shoot(){
        mainObject.GetComponent<Rigidbody>().velocity += initalVelocity;
    }
Now it is time to write Update() and FixedUpdate() methods. In Update() method, we will determine when the simulation will be performed and when the real motion will be run. As we mentioned before, we will perform simulation when the left mouse button is pressed and run the real motion when the left mouse button released. Therefore, we need to know if the mouse button is pressed or not. To obtain this information we need to boolean flag. When the flag is true, we will simulate main scene. This code has to be written in the FixedUpdate() method.
Final code should look like the following:
using System.Collections;
using System.Collections.Generic;
using UnityEngine;
using UnityEngine.SceneManagement;

public class MovementSimulator : MonoBehaviour
{
    private Scene parallelScene;
    private PhysicsScene parallelPhysicsScene;

    public Vector3 initalVelocity;
    public GameObject mainObject;
    public GameObject plane;
    private LineRenderer lineRenderer;

    private bool mainPhysics = true;

    void Start()
    {
        Physics.autoSimulation = false;
        lineRenderer = GetComponent<LineRenderer>();
        lineRenderer.positionCount = 1000;

        CreateSceneParameters createSceneParameters = new CreateSceneParameters(LocalPhysicsMode.Physics3D);
        parallelScene = SceneManager.CreateScene("ParallelScene", createSceneParameters);
        parallelPhysicsScene = parallelScene.GetPhysicsScene();
    }

    void Update()
    {
        if (Input.GetMouseButtonDown(0)){
            SimulatePhysics();
            mainPhysics = false;
        }

        if (Input.GetMouseButtonUp(0)){
            mainPhysics = true;
            Shoot();
        }
    }

    void FixedUpdate(){

        if (mainPhysics)
            SceneManager.GetActiveScene().GetPhysicsScene().Simulate(Time.fixedDeltaTime);
    }

    void SimulatePhysics()
    {
        GameObject simulationObject = Instantiate(mainObject);
        GameObject simulationPlane = Instantiate(plane);

        SceneManager.MoveGameObjectToScene(simulationObject, parallelScene);
        SceneManager.MoveGameObjectToScene(simulationPlane, parallelScene);

        simulationObject.GetComponent<Rigidbody>().velocity = mainObject.GetComponent<Rigidbody>().velocity + initalVelocity;
        simulationObject.GetComponent<Rigidbody>().angularVelocity = mainObject.GetComponent<Rigidbody>().angularVelocity;
        for (int i = 0; i < lineRenderer.positionCount; i++)
        {
            parallelPhysicsScene.Simulate(Time.fixedDeltaTime);
            lineRenderer.SetPosition(i, simulationObject.transform.position);
        }
        Destroy(simulationObject);
        Destroy(simulationPlane);
    }

    void Shoot()
    {
        mainObject.GetComponent<Rigidbody>().velocity += initalVelocity;
    }

}
Do not forget to assign the target object and plane to the MovementSimulator script.
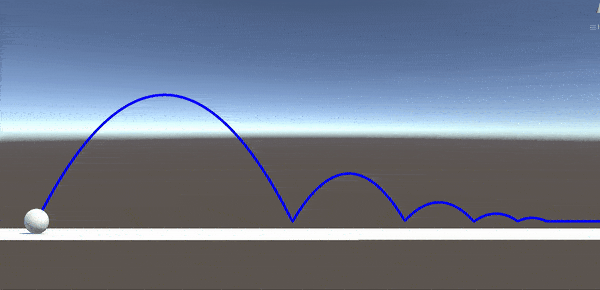
And the result is this:
References
https://en.wikipedia.org/wiki/File:Ferde_hajitas2.svg
https://en.wikipedia.org/wiki/Projectile_motion
https://docs.unity3d.com/ScriptReference/Physics-autoSimulation.html
https://docs.unity3d.com/ScriptReference/SceneManagement.SceneManager.CreateScene.html
https://docs.unity3d.com/2018.3/Documentation/ScriptReference/PhysicsScene.Simulate.html
https://docs.unity3d.com/2019.1/Documentation/ScriptReference/PhysicsSceneExtensions.GetPhysicsScene.html

Merhaba, kodunuz başarılı şekilde çalışıyor fakat top sekmiyor. Sekme olayı ile ilgili farklı bir kod mu yazdınız.
Merhaba, topun sekmesi için topa bir fizik materyali eklemeli ve uygun bir esneklik değeri vermelisiniz.
Nevermind, had to also change PhysicsScene to PhysicsScene2D
Hey, maybe you could explain how to do this using 2D physics? Since this solution doesnt work for that . I convert all rigidbodies to 2D ones, as well as set the scene to LocalPhysicsMode.Physics2D.