Raycasting in Unity3D
Contents
- Introduction
- What is raycasting?
- Using raycasts
- Making rays visible
- Getting information from raycast
- Raycast examples
Introduction
Raycasting is a useful method that you need to use in most games. In this tutorial, we will see how we use them in Unity3D and we will work on a few examples of raycasting.
What is raycasting?
In mathematics, a ray is defined as the part of the line that starts a point and goes off in a particular direction.
In the computer game development, ray casting is an operation in which we send invisible rays out to a specific direction and observe if it hits something that we are looking for. Then, we could get information about that object. In Unity, the object needs to be a collider attached in order to be detected by using raycast.
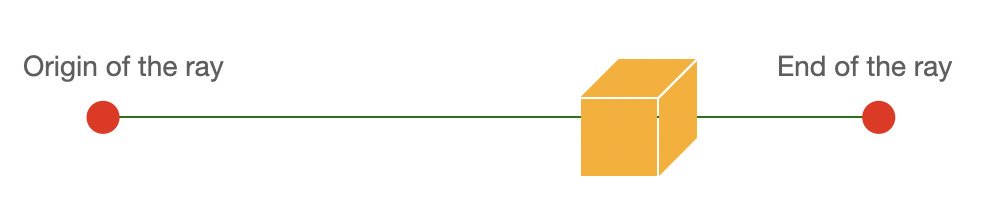
Assume that we create a ray from point O to point P as in the image above. If an object with a collider interrupts this ray, then we can obtain all the information that the object has. We can send rays from any point in any direction and any length. We will work on several examples in detail later, but for now, let me talk about how we use them in order to give you some intuition.
In a shooter game, we use raycasts to detect if the bullets that the player fires shoot the enemy. We create a ray from our player’s gun to the forward direction and check if the ray hits an enemy object.
Another usage, for instance, in a car race game, we may use them to check if there are any other car’s around our car. We send rays to each direction from our car and try to detect if they hits any other collider.
Likewise, we can select objects by clicking on them. In this case, we send rays from the position of the mouse in world space coordinates.
Using raycasts
In order to cast rays in Unity3D, we use the static method Physics.Raycast( ) in Physics class. This method has a couple of variations. We either create a ray before and use that ray as a parameter for the method or directly give parameters the start point, direction, and magnitude of the ray that will be cast.
The following creates a ray object that starts from the origin along the x-axis:
Ray myRay = new Ray(new Vector(0,0,0), new Vector(1,0,0));
Here, the first parameter of the constructor is the starting point of the ray and the second one specifies the direction.
We may use this ray with the static method Physics.Raycast( ). This method returns a boolean value that specifies if the ray hit a collider or not. For instance, one of the overloading variations of the static method Physics.Raycast( ) is given in the code sample below:
 if(Physics.Raycast(myRay, maxDistance)){
    // Do something
 }
Making rays visible
Sometimes, you may need to visualize the rays for debugging. You can do this by using the static method Debug.DrawRay( ). The following code will draw a black ray from the origin to point (2,0,0) for every frame in the scene view.
void Update()
{
    Debug.DrawRay(new Vector3(0, 0, 0), new Vector3(2f, 0f, 0f), Color.black);
}
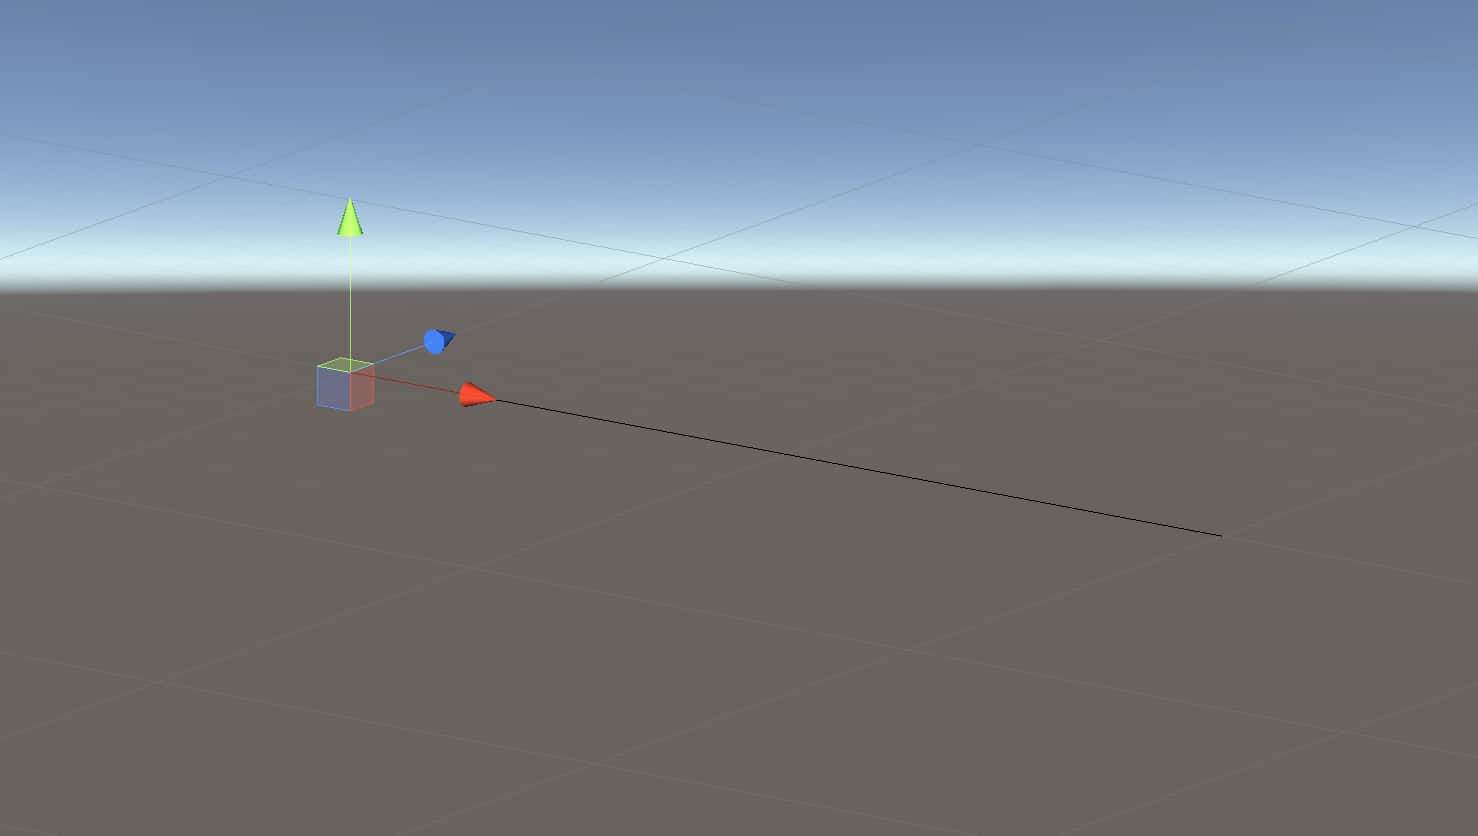
In the code above, we did not specify the duration, which meant that the ray is rendered in only one frame. But since we put that in the Update method, the ray was visible in every frame. On the other hand, you can specify a duration that determines how much time the ray will be visible. To do this, you need a fourth parameter in the method. This fourth parameter has to be in a float type. For instance, in the case of the usage of the Debug.DrawRay( ) method as seen below, the ray will be visible for 5 seconds after the scene starts then disappear.
void Start()
{
    Debug.DrawRay(new Vector3(0, 0, 0), new Vector3(2f, 0f, 0f), Color.black, 5f);
}
Getting information from raycast
Generally, we need to gather information from the object that the raycast hits. This information could be the tag, the name or the layer of the object, the hit point, transform of the object, or the rigidbody component. Furthermore, we also might access other components or scripts that are attached to the object which the raycast hits.
To get information from the object, we create an object that is in RaycastHit type. Then we access properties of the raycast or the object.
Ray myRay = new Ray(new Vector(0,0,0), new Vector(1,0,0));
RaycastHit hit;

if(Physics.Raycast(myRay, out hit)){
    Debug.Log(hit.transform.position);
 }
Raycast examples
Let’s make some examples to gain experience about how we use raycasts in Unity3D on different tasks.
Detecting objects and accessing properties
As the first example, we will detect objects then access their materials, check the color of the material and if the color of it is red, set the material color to blue. Let’s think as if we are creating a sensor that detects the color of an object. I will attach the script that we will write to a blue cube that can be represented as a sensor.
First of all, let’s create a ray. The ray may start from the pivot point of the sensor in the -y direction:
Ray ray = new Ray(transform.position, new Vector3(0f, -1f, 0f));
Now, we can use this ray for raycasting.
if(Physics.Raycast(ray, out RaycastHit hit, 2f)){

}
Above, the first parameter of the method Physics.Raycast( ) is the created ray, the second parameter is the RaycastHit object. Previously, we created the RaycastHit object outside of the Raycast( ) method. It can also be created this way. The final parameter determines the length of the ray. In our example, the length of the ray is 2 units.
In order to access the attached material of the detected object, we first need to get its renderer:
if(Physics.Raycast(ray, out RaycastHit hit, 2f)){
    Material hitObjectMaterial = hit.transform.GetComponent<Renderer>().material;
}
Finally, we need to check if the material color is pure red or not, and also change it to blue if it is red.
if(Physics.Raycast(ray, out RaycastHit hit, 2f)){
    Material hitObjectMaterial = hit.transform.GetComponent<Renderer>().material;
    if(hitObjectMaterial.color==Color.red){
        hitObjectMaterial.color = Color.blue;
    }
}
The full script is given below.
using System.Collections;
using System.Collections.Generic;
using UnityEngine;

public class BlueSensor : MonoBehaviour
{
	private void FixedUpdate()
	{
        Ray ray = new Ray(transform.position, new Vector3(0f, -1f, 0f));

        if(Physics.Raycast(ray, out RaycastHit hit, 2f)){
            Material hitObjectMaterial = hit.transform.GetComponent<Renderer>().material;

            if(hitObjectMaterial.color==Color.red){
                hitObjectMaterial.color = Color.blue;
            }
        }
	}
}
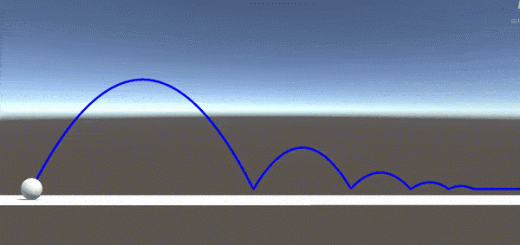
The following video shows the result. Here, the script is attached to the blue cube.
Raycast from the camera
In this example, we will send a ray from the camera to the mouse position and if the ray hits a red object, we will change the object’s color as in the previous example.
Since we want to send the rays from the camera and for a reason that we will mention a little later, first we need to get the Camera component of the camera.
Camera cam;

private void Start()
{
    cam = Camera.main;
}
If we get the camera component then we can use ScreenPointToRay( ) method. This method returns a ray from the camera through a screen point. We will pass the mouse position as the parameter to this method.
Ray ray = cam.ScreenPointToRay(Input.mousePosition);
The rest of the code is very similar that we made in the last example. There are two simple differences. The first one, I want to create rays when I click on the object. And the second one, the rays should not have a range. The full code is the following:
using System.Collections;
using System.Collections.Generic;
using UnityEngine;

public class RaycastTutorial : MonoBehaviour
{
    Camera cam;

	private void Start()
	{
        cam = Camera.main;
	}

	private void Update()
	{
        Ray ray = cam.ScreenPointToRay(Input.mousePosition);

        if(Input.GetMouseButtonDown(0)){
            if (Physics.Raycast(ray, out RaycastHit hit))
            {
                Material hitObjectMaterial = hit.transform.GetComponent<Renderer>().material;

                if (hitObjectMaterial.color == Color.red)
                {
                    hitObjectMaterial.color = Color.blue;
                }
            }
        }
	}
}
You can add this script to any object in the scene. And this is the result:
Moving objects by dragging them
In this example, we will move an object by dragging it. We will send a ray from the camera to the mouse position and dynamically change the position of the object that the ray hits. The problem here is the following. When we create a ray, it does not represent a position. Instead, it represents infinitely many positions. Therefore, we have to specify an exact coordinate where we want the object needs to be. The solution to this problem is creating a mathematical plane and finding the intersection point of the ray and the plane. Hence, the object will move on this plane.
using System.Collections;
using System.Collections.Generic;
using UnityEngine;

public class DragDrop : MonoBehaviour
{
    void OnMouseDrag()
    {
        Plane movementPlane = new Plane(Vector3.up, transform.position);
        Ray ray = Camera.main.ScreenPointToRay(Input.mousePosition);

        float enter = 0f;
        if (movementPlane.Raycast(ray, out enter))
        {
            Vector3 fingerPos = ray.GetPoint(enter);
            transform.position = fingerPos;
        }
    }
}
A point and a normal specify a plane. In the code above, we created a plane that intersects the related object from its transform position and this plane has a normal in the upward direction in the world space.
Attach this script to the objects that you want to move. And this is the result: