How to Apply Force to an Object in Unity3D
Most digital games simulate real-world physics to create realistic and intuitive gameplay. Therefore, knowledge and experience on how the physics laws are implemented into a game are crucial for a game developer. Unity’s built-in physics engine makes your life easier and hence you do not need to invent the wheel again. Instead, you should focus on how you can use this built-in physics engine to simulate the real-world.
For instance, you can apply a custom force to an object using AddForce() method which is in Rigidbody Class of the UnityEngine.
We will see how we use this method in our scripts in the following parts of this article in detail, but first, let me explain some basic concepts. However, if you are already familiar with the basics of these concepts, you may skip the next part.
What is force?
A force is described as an interaction that changes the motion of an object. When a force is applied to an object, speed and/or the direction of the motion of the object change. If there is no force that is applied to an object, that object retains its movement as is.
A ball falls to the ground because of the gravitational force which is applied by the Earth. And the same ball bounces from the ground because of the reaction force that is caused by the ground when the collision happens. Likewise, a plane can fly and a fish can swim because of forces.
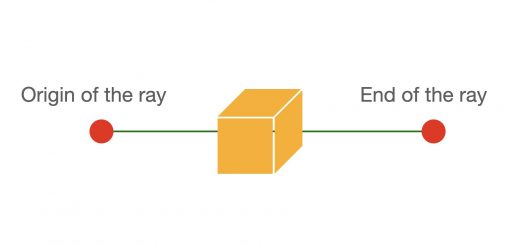
A force has a magnitude and a specific direction. This means that it is a vector quantity and therefore we can represent them as little, lovely arrows. We can add, subtract or multiply them with each other or with regular numbers(aka scalars). Nevertheless, you should keep in mind that these mathematical operations have their own rules. You can follow this link to find out more about vectors and vector operations.
Adding a Constant Force on an Object
In order to apply a force on an object in Unity3D, you have to attach a Rigidbody component to the related object. By adding this component, you determine the movement of this object is driven by the built-in physics engine of Unity3D. On the other hand, you can make some cheats to obtain the behavior which you want.
For instance, when you add a Rigidbody component to an object, it is affected by the gravitational force and therefore, it falls when you play the scene. If your game takes plays in the space, probably, you do not want this behavior. To switch off the gravitational force, you can uncheck the Use Gravity checkbox in the Rigidbody component.

Let’s return to our discussion. In order to apply a force to your object, you can add a Constant Force component.
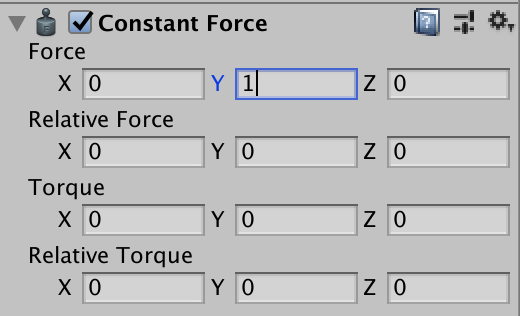
By adding a Constant Force component to your object, you can control Force, Relative Force, Torque and Relative Torque properties from the inspector in Unity editor.
You should keep in mind that this is only one of the applied forces to your object. There may be several other forces like gravitational force or reaction forces which are caused by other objects. In these cases, your object will move according to the sum of all forces.
In addition to controlling the properties of the Constant Force component from the inspector, you can control them using C# script. For instance, the following script changes the direction of the applied force to the opposite side.
using System.Collections;
using System.Collections.Generic;
using UnityEngine;

public class ForceController : MonoBehaviour
{
    void Update()
    {
        if (Input.GetMouseButtonDown(0))
            GetComponent<ConstantForce>().force *= -1f;
    }
}
Apply Force by a C# Script
Alternatively, instead of adding a new component to your object, you can apply forces directly by C# using the existing Rigidbody component. Here, I have to remind you that, in Unity, we put our all code which is related to the physics calculations, into the FixedUpdate() method. Addforce() method which is in the Rigidbody class allows us to apply forces.
For example, the following script will apply a continuous force to our object on the x-direction.
using System.Collections;
using System.Collections.Generic;
using UnityEngine;

public class ForceController : MonoBehaviour
{
    Rigidbody rb;

    void Start()
    {
        rb = GetComponent<Rigidbody>();
    }

    void FixedUpdate()
    {
        rb.AddForce(new Vector3(1f, 0f, 0f), ForceMode.Force);
    }
}
The second parameter in the AddForce() method determines how the force is applied. In the example above, ForceMode.Force determines that this force will be applied continuously. Another widely used mode is the ForceMode.Impulse which applies impulses. In order to see more information about force modes, you can click here.
Jumping by Applying Forces
In this part of the article, we will write a basic Jump script as an example of the usage of adding custom forces.
There are several approaches to jumping behavior. One of the widespread methods is to apply an impulse to the object.
In this example, our aim is to make our object jump when we click the screen. We have to apply the force only one time and also we have to prevent applying the force while the object is not touching the ground. Therefore, we are going to check by using two boolean variables, if the object is already in jumping condition and is grounded. Here, I also remind you again that it is a good practice to write anything which is related to physics calculations into the FixedUpdate() method. Hence, we will detect the mouse click in the Update() function, but execute the Jump() method in FixedUpdate() function.
An object that the following script is attached will jump. (Do not forget to set the tag of the plane as “Ground”).
using System.Collections;
using System.Collections.Generic;
using UnityEngine;

public class Jumping : MonoBehaviour
{
    private Rigidbody rb;
    private bool isGrounded;
    private bool jumpingCondition;

    void Start()
    {
        rb = GetComponent<Rigidbody>();
    }

    void Update()
    {
        if(Input.GetMouseButtonDown(0))
        {
            jumpingCondition = true;
        }
    }

    void FixedUpdate()
    {
        if (jumpingCondition && isGrounded)
            Jump();
    }

    void Jump()
    {
        rb.AddForce(new Vector3(0f, 3f, 0f), ForceMode.Impulse);
    }

    void OnCollisionEnter(Collision collision)
    {
        if (collision.collider.gameObject.tag == "Ground")
        {
            isGrounded = true;
            jumpingCondition = false;
        }
    }

    void OnCollisionExit(Collision collision)
    {
        if (collision.collider.gameObject.tag == "Ground")
        {
            isGrounded = false;
        }
    }
}
And this is the result:
We have several other Unity3D tutorials. You can check them out here.