
Forcefield Shader using Shader Graph in Unity3D
In this tutorial, we are going to create a forcefield shader using Shader Graph in Unity3D. This is a part of our tutorial series on Shader Graph. In order to see our other Shader Graph tutorials, you can follow this link. If you are new to shader development, I suggest you follow the first few tutorials in the given order to be familiar with shader development.
At the end of the tutorial, we will obtain the following result.
Preparation
Let’s start by creating a new PBR Shader Graph and call it ForceFieldShader. We need to control the shape of the pattern, changing speed and color from the editor. To do this, add three properties like the image below.
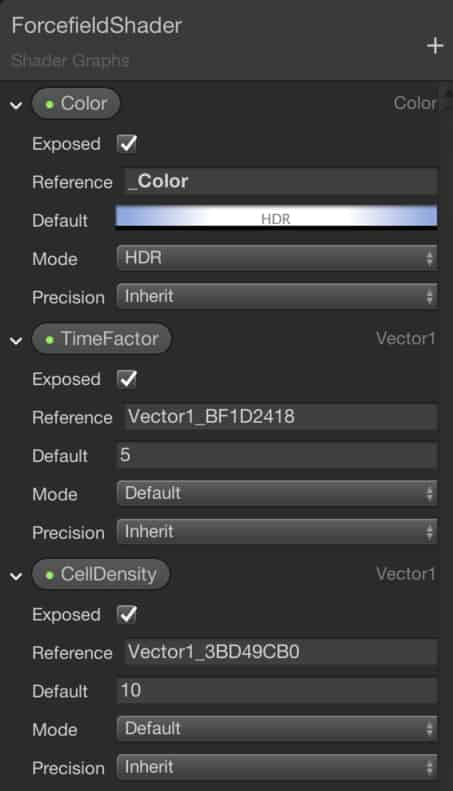
Setting HDR from the Mode selection drop-down menu in Color property allows us to use HDR colors.
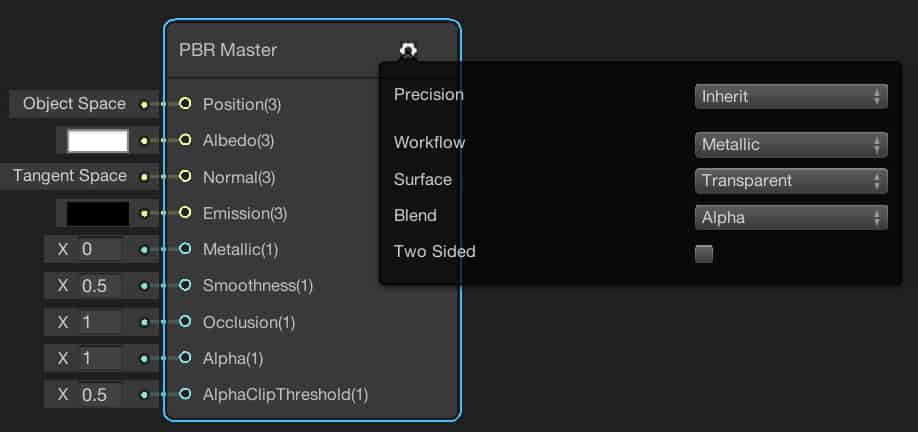
We also need to make our shader transparent. To do this, click the gear icon on the PBR Master Node and change the Surface option to Transparent.
Fresnel Effect Node
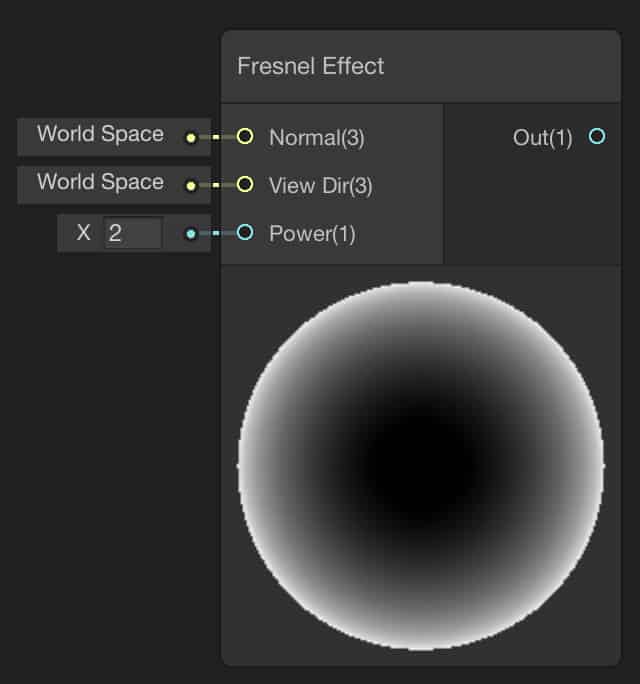
As you see in the gif at the top of the page, we want a sphere that is transparent at the center. Nevertheless, transparency has to decrease from the center to outer. In order to obtain this result, we can use a Fresnel Effect Node.
By using the Fresnel Effect Node, we will get a value of 1 for the outer pixels and 0 for the center pixels. I suggest you change the value of the Power port and observe the result.
In later parts of the tutorial, we will use this node to obtain the gradient transparency by connecting the branch in which it is used to the Alpha port of the PBR Master Node.
Voronoi Node
The Voronoi Node creates a Voronoi Noise (also known as Worley Noise). For more information about this noise function, you can follow this link to see the article about it in Wikipedia.
We have three input ports on the Voronoi Node. The first one is the UV port which we will not change.
The second one is the Angle Offset port. When we change the Angle Offset value, the orientation of the cells changes.
We are going to change the value of the Angle Offset by time to create a dynamic pattern on the forcefield shader.
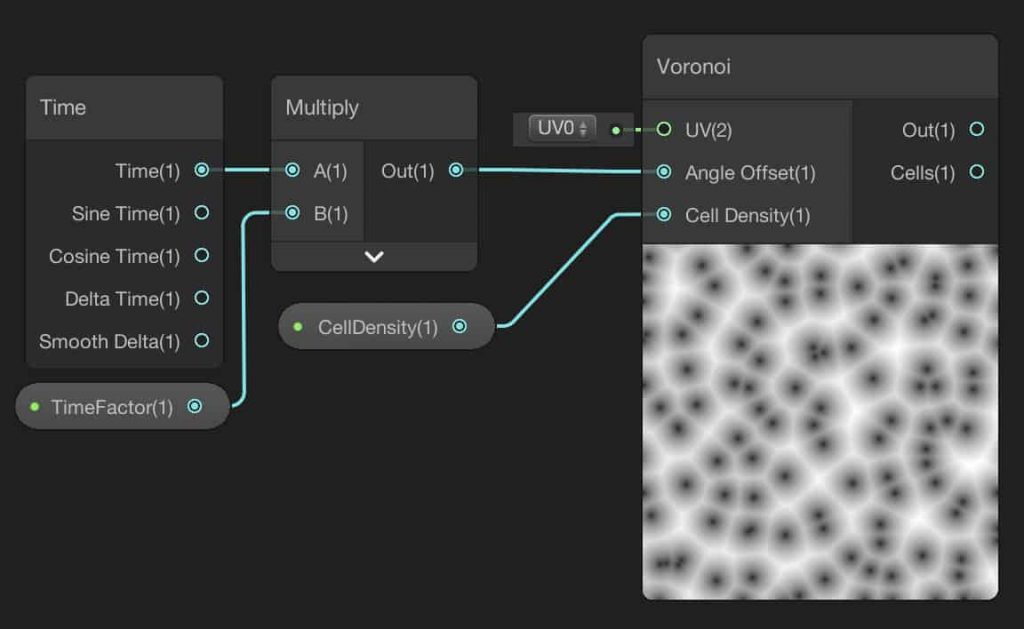
The third input port of the Voronoi Node is the Cell Density port. We are going to use this port to set the size of the cells on the forcefield shader pattern.
Construction of the Forcefield Shader
Add a Voronoi Node to your graph. As I mentioned above, we will change the orientation of the cells by time. Therefore, we will add a Time Node. In addition, to set the speed of the orientation change, we need to use a Multiply Node. To determine the speed of the orientation change, we multiply TimeFactor property by Time. Moreover, in order to set the size of the cells, add the CellDensity property and connect it to the CellDensity port of the Voronoi Node.
Now, it is time to create the gradient transparency from center to outside. To do this, add a Fresnel Effect Node and multiply the output of the Voronoi Node and Fresnel Node, then connect the Multiply Node to Alpha port of the PBR Master Node.
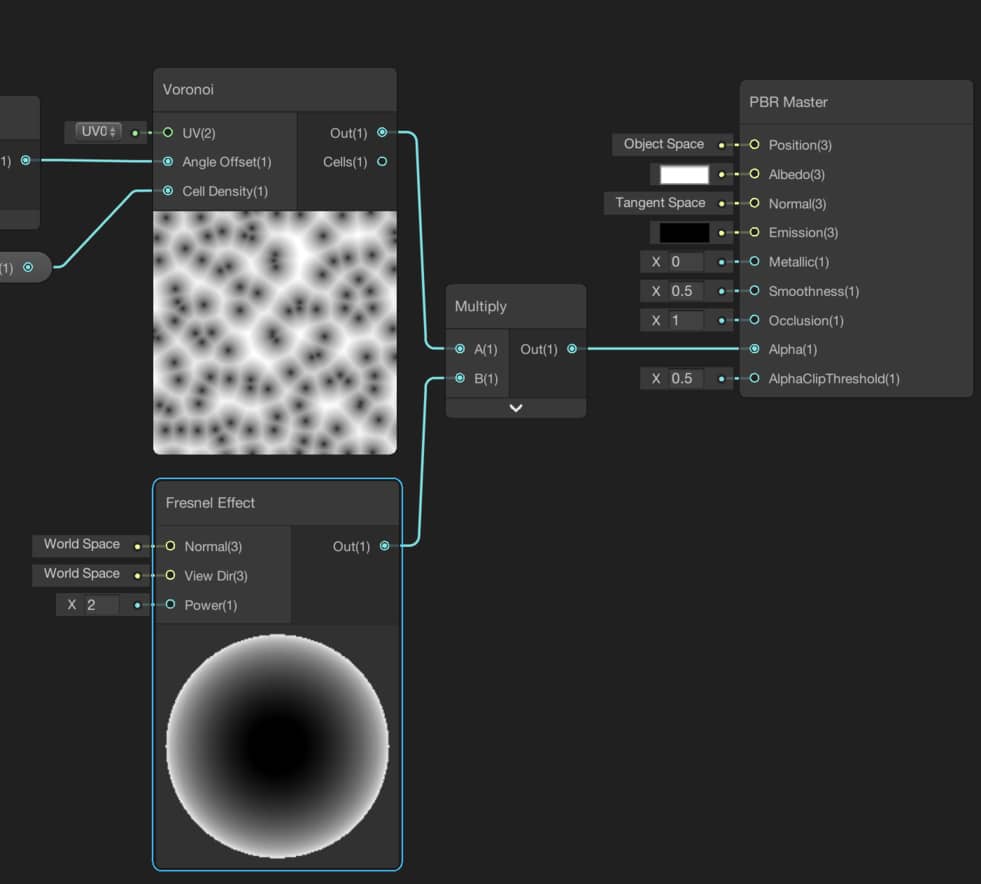
If you observe the current result on a sphere, you will see that we have a Voronoi Pattern on the surface of the sphere that creates transparency. Currently, semi-transparent and opaque pixels have the color which is set by the Albedo. However, since we want to make it glow, we need to set an emission color for those pixels that is proportional to their alpha values.
To do this, add the Color property to the shader graph and multiply it with a new branch that is taken from the current Multiply Node as the image below. Finally, we have to connect this new branch to the Emission port of the PBR Master Node.
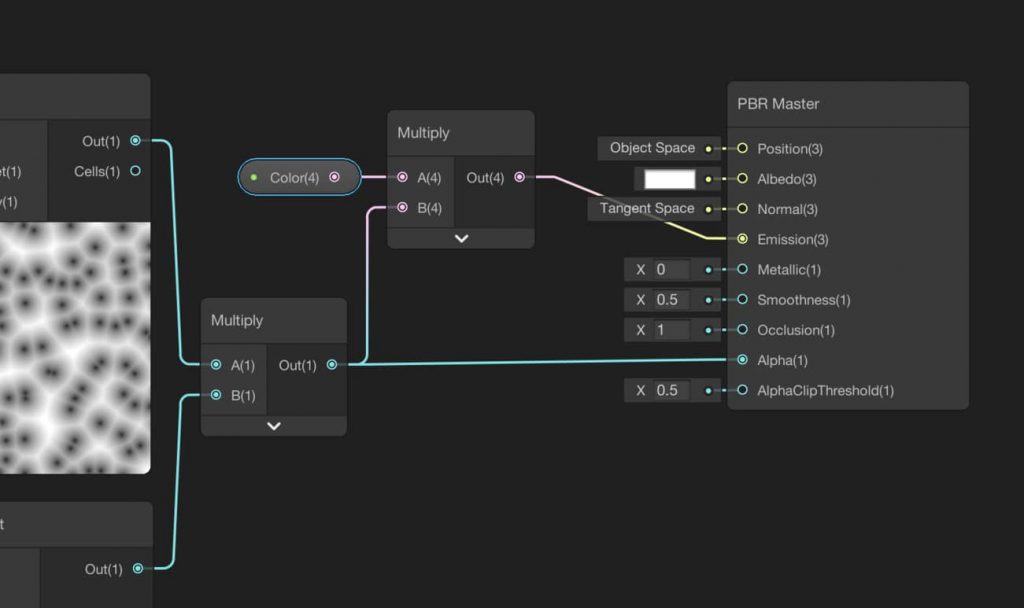
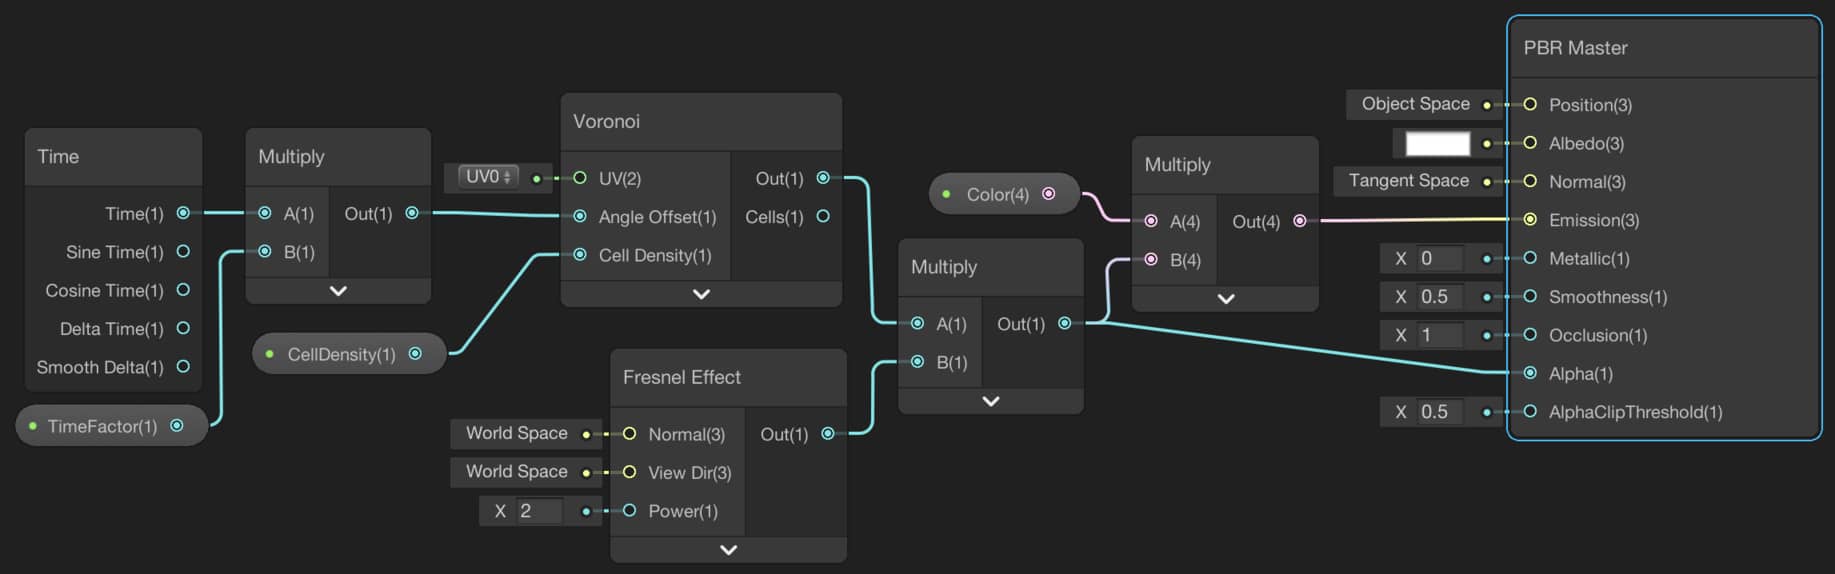
The following image shows the final forcefield shader graph.
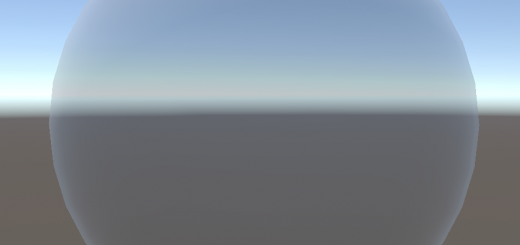
Save the shader. Create a sphere and a new material for this shader. And assign the material to the sphere. You should see the following result.

Thank you so much !
it’s so easy when you explain!
Thank again !!!!!
You are welcome.
I hope don’t say this too late, and sorry for my bad English.
Thanks so much, I was 2 days trying to do something like this, and any tutorial work for me.
But this work perfectly, and help to do the base of the effect i wanted to do.
THANKS!
You are welcome. I am pleased to see that. Do not worry, your English is fine.