Snow Shader Tutorial with Shader Graph in Unity3D
In this tutorial, we are going to learn how we can create a snow shader using Shader Graph in Unity3D. This article is a part of the tutorial series on Shader Graph. If you would like to see our other Shader Graph tutorials, you can follow this link.
At the end of the tutorial, we are going to obtain the following shader:
Before we start to develop snow shader, let’s see the mathematics behind it. If you are already familiar with vector mathematics and its usage in computer graphics, you may skip the next part.
Normal Vector and Dot Product
Vector mathematics is the language of computer graphics. Therefore, you should learn how to do mathematics in 3D space.
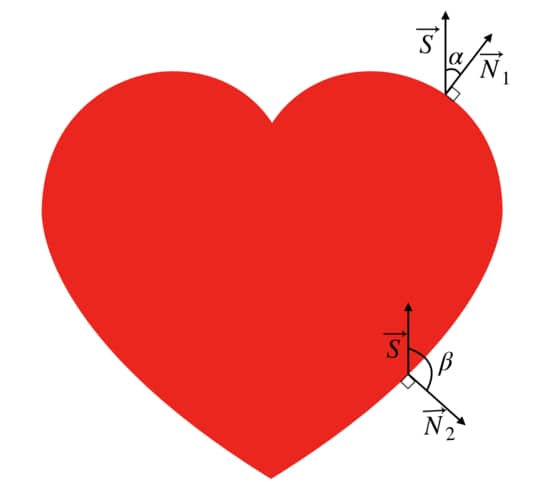
As we mentioned in our previous tutorials, a 3D model is nothing but a set of mathematical coordinates in 3D space. We call them vertices. In addition to position information, each vertex also has additional information. One of these information is normal vector. In mathematics, a normal vector is defined as the unit vector which is perpendicular to its surface at a point. For instance, in the image right, \( \vec{N}_1 \) and \( \vec{N}_2 \) represents two different normal vectors at two different points on a surface.
In computer graphics, we assume that there is normal vector information that is embedded in vertices. Using these vertex normals information, normal vectors of each pixel, which belongs to that object, is calculated by the GPU. And using these calculated normal vectors, we can determine if the surface is looking to a specific direction or not. To do this, we use dot product.
Assume that we are looking for if a point on a surface is looking to up direction like in the image above or not. In order to determine the orientation of the surface at that point, we calculate the dot product of normal and the up direction vectors.
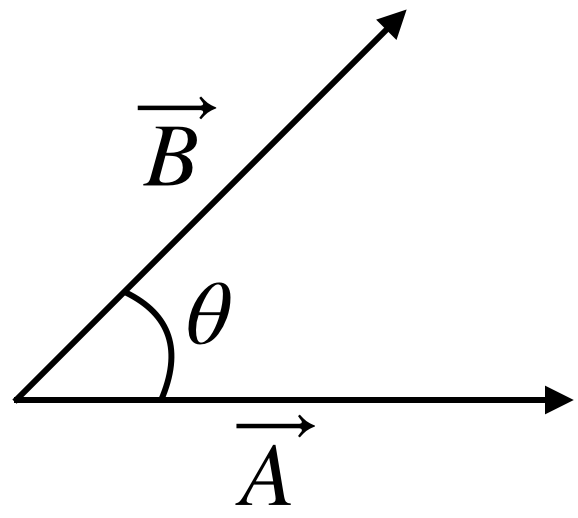
The dot product of two vectors is calculated by the following:
\( \vec{A} \cdot \vec{B} = |A| |B| \cos{\theta} \)
In other words, we multiply the magnitudes of the vectors and cosine of the angle between them. If the angle between them is 0, then the dot product has the maximum value. On the other hand, if the angle is 90 degrees, the value will be 0 and if it is higher than 90 degrees, the value will be negative.
Since normal vector and our direction vector are unit vectors, the dot product of these vectors will be between -1 and 1. And if the dot product is equal to 1, that means both vectors are in the same direction. And how much that value decreases, that means how much much they are pointing out different directions.
Creating the Snow Shader
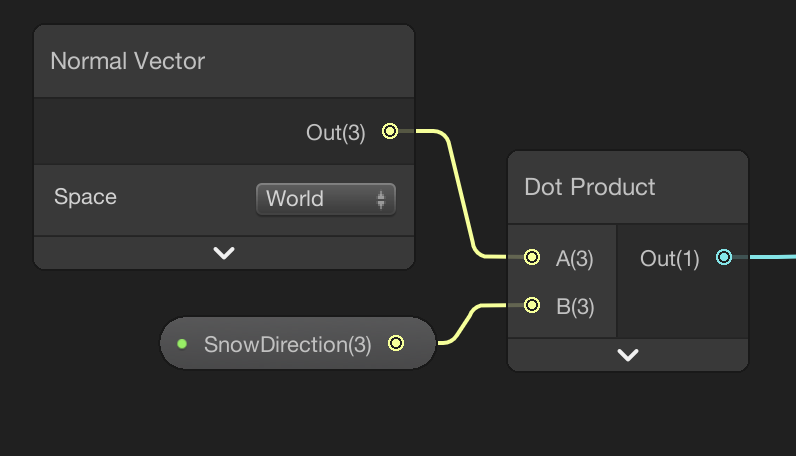
The effect which we are looking for is to make the part of the surface white that is pointing out the desired direction. Therefore, begin by adding a Normal Vector Node. The Normal Vector Node gives us the normal vector of the pixel that this shader works for.
In order to determine the snow direction, add a SnowDirection property. This property has to be in vector3 type.
Connect the two nodes to a Dot Product Node.
Now, we need to compare the result of the dot product with a predetermined value. If the outcome of the Dot Product Node is greater than this predetermined value, we will make that pixel white. Otherwise, we will make it the color that is mapped from the texture of the object.
Create a SnowAmount property and in addition, add a Remap Node and a Comparison Node. Connect the nodes as follows:
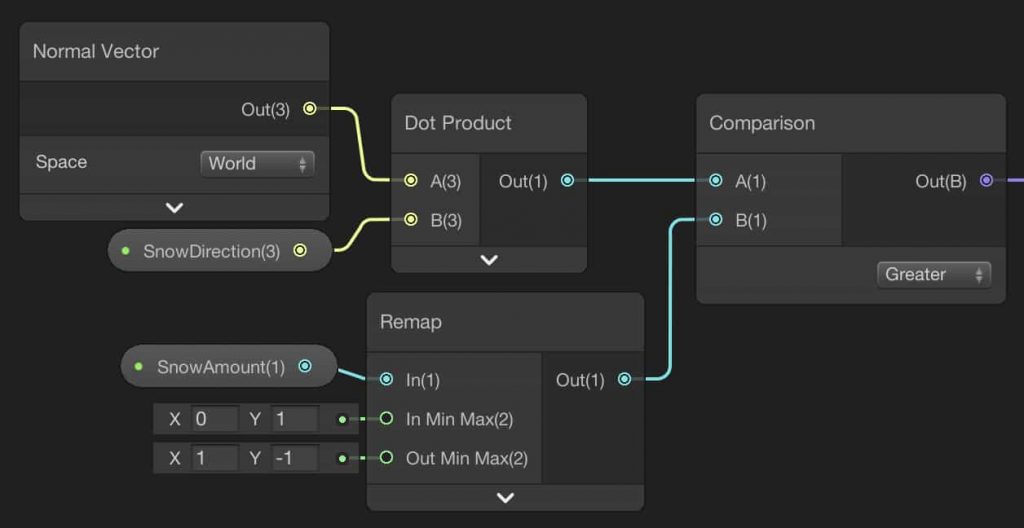
The aim of the Remap Node is to make the SnowAmount value more intuitive. In the properties panel, change the mode of the SnowAmount property to a slider and restrict the value between 0 and 1. Therefore, we will obtain the value 1 when there is no snow at the output of the Remap Node. Likewise, the output value of the Remap Node will be -1 if the amount of snow is high.
Using Branch Nodes, we are going to convert the output of the Comparision Node to float values and multiply them with color values. If the pixel’s orientation is close to SnowDirection, we will multiply it with Color property, otherwise, we will multiply it with the mapped texture. And finally, we are going to sum two branches. Final shader should look like this:
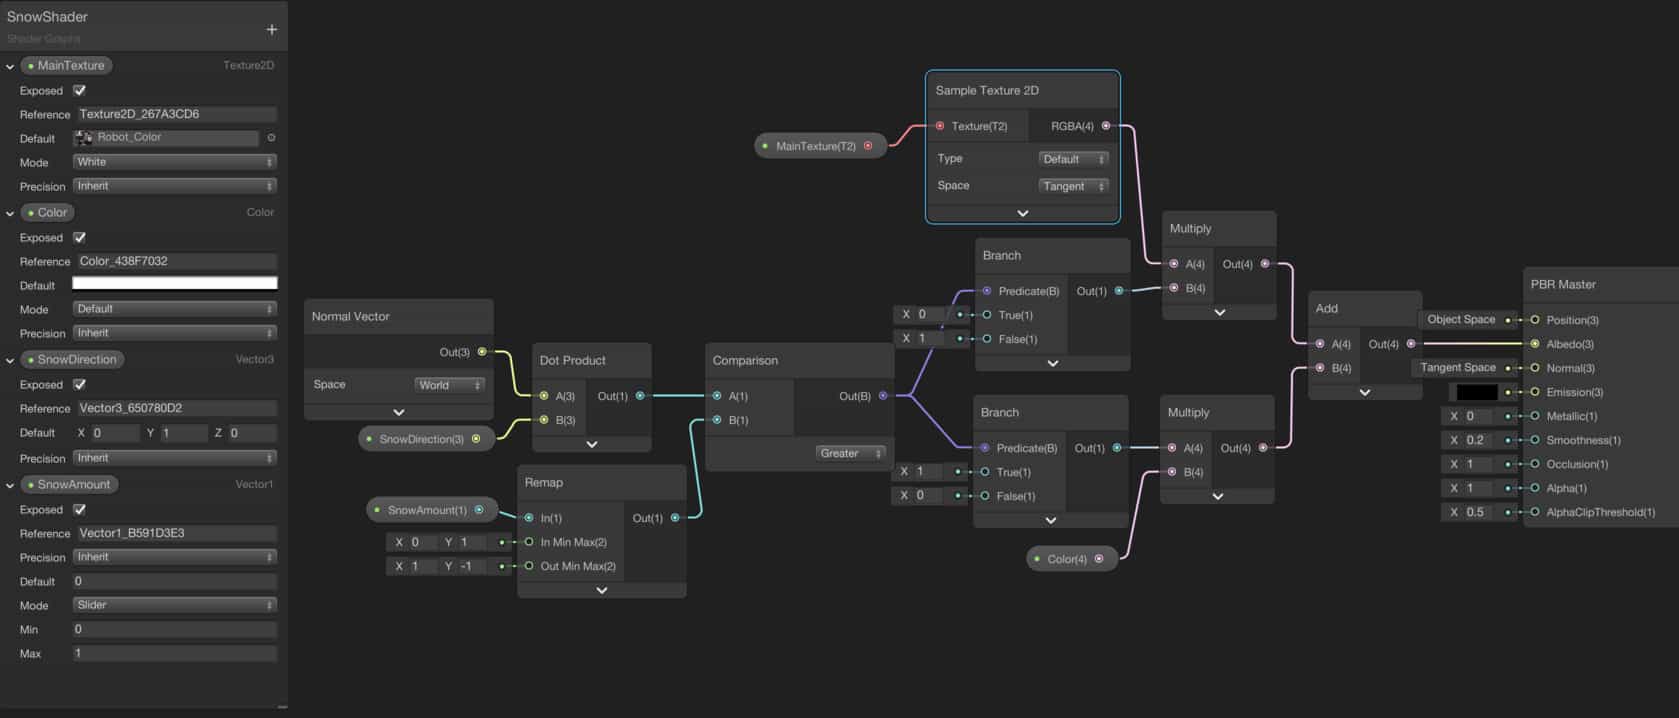
Hence, we completed our Snow Shader and this is the outcome: