
Colliders and Triggers in Unity3D
Many games simulate real-world physics and collisions are also a crucial part of these simulations. Likewise, while we develop games, most of the time we start or stop events based on other events. We use colliders and/or triggers for these purposes.
In this article, we will see…
- the difference between a collider and a trigger.
- how we can add a collider to an object.
- what the most used collider types are.
- creating a physics material to add properties like bounciness and friction.
- detecting collisions.
- how we can run events using triggers.
- how to ignore collisions between objects that have certain layers.
What is the difference between colliders and triggers?
In Unity, colliders are components that allow the physics engine to handle the collisions. The physics engine simulates collisions using colliders. We can determine which objects will collide with each other, or how objects will behave under collisions using colliders.
On the other hand, triggers are special setups of colliders. The purpose of triggers is to trigger events when more than one objects overlap. If an object has a collider that is configured as a trigger, that object does not collide with any other object but overlap instead.
Adding a Collider
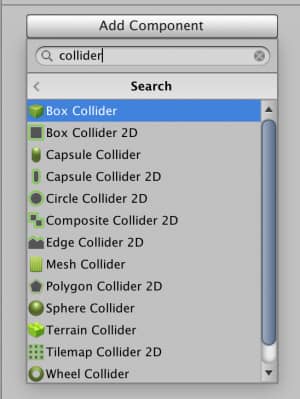
There are several collider types in Unity3D. Some of them are Box Collider, Capsule Collider, Sphere Collider, MeshCollider, Terrain Collider, and Wheel Collider. There are also 2D versions of these colliders.
Mesh Collider creates a collider that exactly covers complex meshes. However, physics calculations for mesh colliders are expensive and if possible, you should avoid using them. Most of the time developers add few primitive colliders in order to cover the object. Generally, it is sufficient to cover most parts of the object.
Primitive objects come with colliders attached. If you import a custom mesh into your scene, you need to add a collider component for that object. Let’s see some of the colliders in detail.
Box Collider
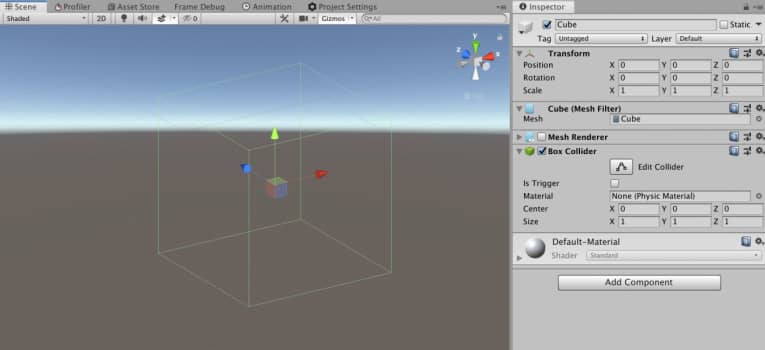
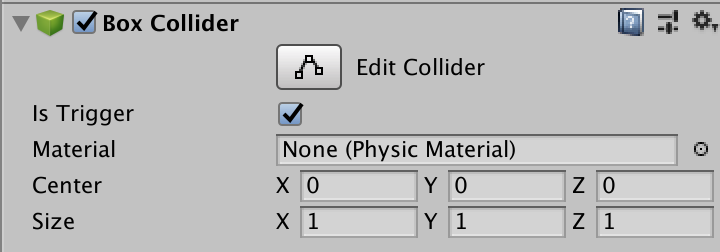
Box Collider is one of the most used colliders. By using its properties, you can determine if this collider is a trigger or not (do not worry about triggers yet, we will see it in detail later) or its center and size. In addition, you can attach a physics material that specifies the friction coefficient and bounciness (we will see physics materials in a minute). You can control all these properties in the inspector as well as in C# script. Here are some code samples that control these properties:
//Get the box collider component and assign it to boxCollider variable
BoxCollider boxCollider = GetComponent<BoxCollider>();

//Set the center of the box collider
boxCollider.center = new Vector3(0f, 0.5f, 0f);

//Set the size of the box collider
boxCollider.size = new Vector3(2f, 2f, 2f);

//Disable the box collider
boxCollider.enabled = false;
Sphere Collider
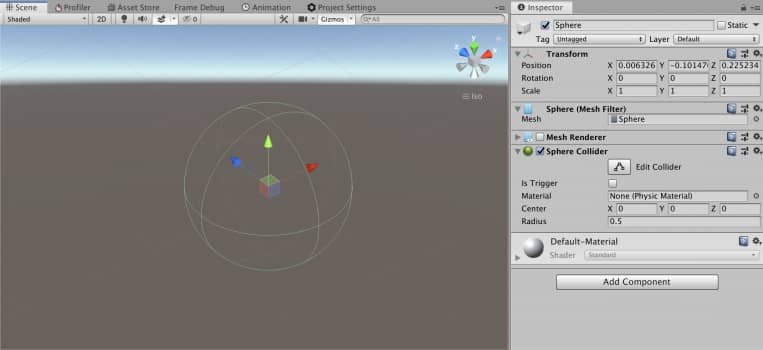
The second collider that we will see is the sphere collider. You can control its IsTrigger, material, the position of center and radius properties. You can also access these properties using C# scripts. Here are some code samples:
//Get the sphere collider component and assign it to sphereCollider variable
SphereCollider sphereCollider = GetComponent<SphereCollider>();

//Set the center of the sphere collider
sphereCollider.center = new Vector3(0f, 0.5f, 0f);

//Set the size of the sphere collider
sphereCollider.radius = 0.8f;

//Disable the sphere collider
sphereCollider.enabled = false;
Capsule Collider
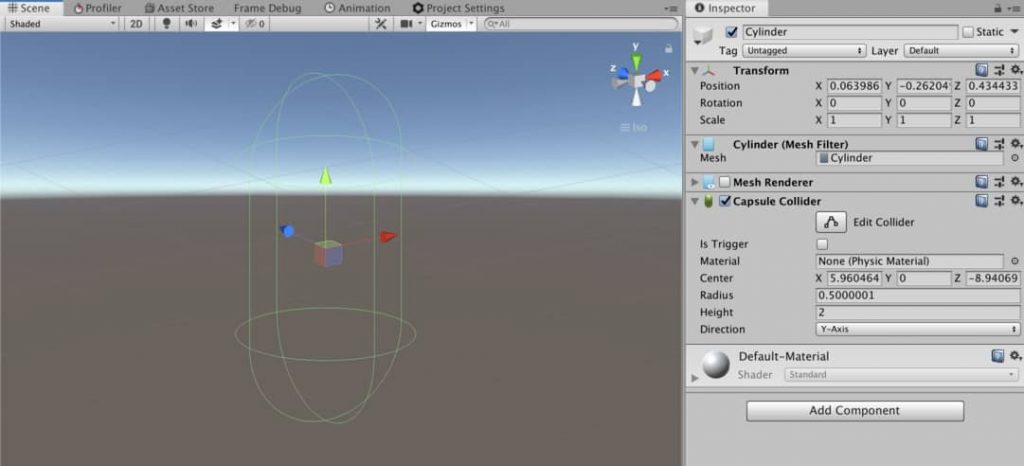
Another important collider is the capsule collider. Like box collider and sphere collider, you can control properties like center, radius, and height. You can assign a physics material, and also change the direction. Direction property changes the orientation of the collider. Developers generally use capsule colliders for characters. The following code samples control some properties of a capsule collider:
//Get the capsule collider component and assign it to capsuleCollider variable
CapsuleCollider capsuleCollider = GetComponent<CapsuleCollider>();

//Set the center of the capsule collider
capsuleCollider.center = new Vector3(0f, 0.5f, 0f);

//Set the direction of the capsule collider
capsuleCollider.direction = 0;
Mesh Collider
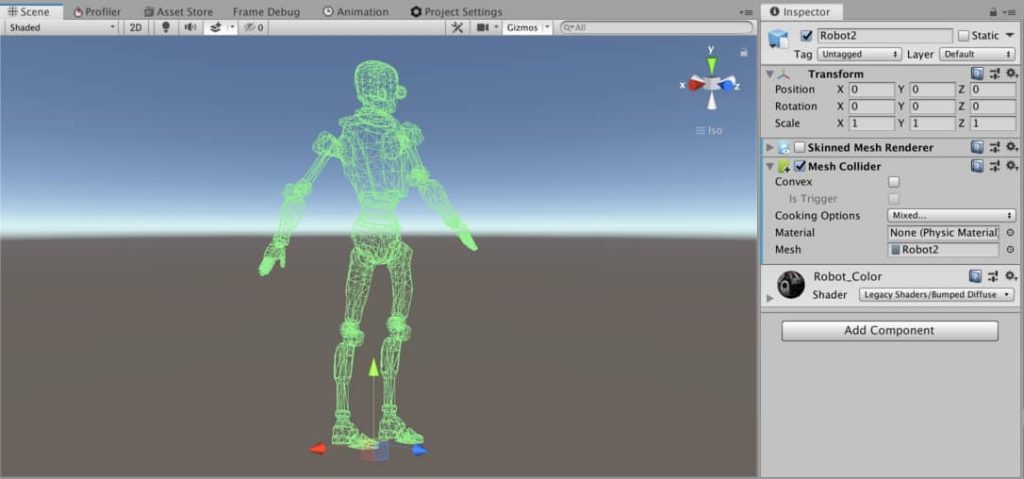
Mesh collider is a type of collider that has the same geometry with the mesh that is associated. This allows the physics engine to make very accurate collision calculations. However, as I mentioned above, you should keep in mind that using mesh collider is expensive and you should avoid using it if possible. Instead, you should consider using a combination of primitive colliders.
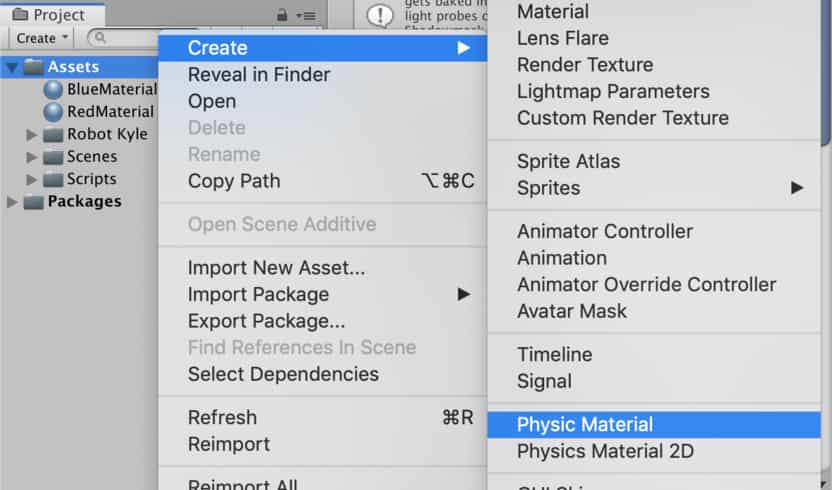
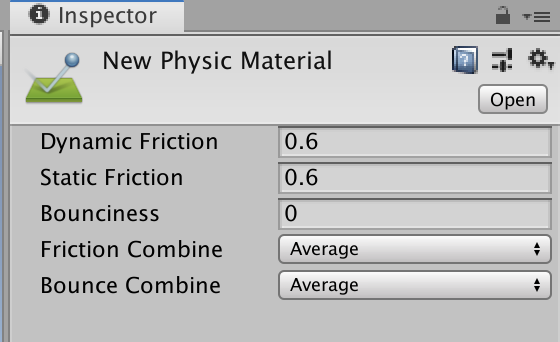
Physics Materials
When you want to add physical properties like the bounciness or friction, you need to create a physics material and assign it to the related collider. To create a physics material, right-click on the assets folder in the project tab, then go to Create and finally select Physics Material. You also need to assign this material to the collider.
The following video shows a collision of colliders that do not have any physics material. (In this scene, there is also a rigidbody attached to the white ball.)
And the following image shows the collision that both objects have the same physics material with 0.6 bounciness.
Detecting Collisions
We can execute pieces of codes when a collision starts or ends. Moreover, we can obtain information about the collision as contact points or impact velocity. Let’s see how we can handle collisions.
OnCollisionEnter is executed when the collider of a rigidbody touches another collider. Likewise, OnCollisionStay and OnCollisionExit are executed while collider continues to touch or leaves. The following script that is attached to the ball prints on the console corresponding messages.
using System.Collections;
using System.Collections.Generic;
using UnityEngine;

public class CollisionDetection : MonoBehaviour
{
    private void OnCollisionEnter(Collision collision)
    {
        Debug.Log("Collision started.");
    }

    private void OnCollisionStay(Collision collision)
    {
        Debug.Log("Collision continues.");
    }

    private void OnCollisionExit(Collision collision)
    {
        Debug.Log("Collision ended.");
    }
}
In addition, you can get the properties of the colliding object. The following script that is attached to the ball will give you the colliding object.
public class CollisionDetection : MonoBehaviour
{
    private void OnCollisionEnter(Collision collision)
    {
        Debug.Log(collision.collider.name);
    }
}
Now, assume that you want to detect only collisions with Blue Object. In this case, you can check the colliding object and also get properties of the collision. For instance, the following script attached to the ball prints the impulse and relative velocity of collision when the ball hits the Blue Object.
public class CollisionDetection : MonoBehaviour
{
    private void OnCollisionEnter(Collision collision)
    {
        if(collision.collider.name=="BlueObject"){
            Debug.Log(collision.collider.name);
            Debug.Log("Impulse: " + collision.impulse);
            Debug.Log("Relative Velocity" + collision.relativeVelocity);
        }
    }
}
Triggers
In games, you trigger events when something happens. For instance, you may want to open a door when a player comes to a certain point. In these cases, we use triggers to execute some pieces of code.
In order to use triggers, you have to enable them by checking the IsTrigger checkbox in the collider component.
If you set a collider as a trigger, that collider will not collide with any other collider. It is able to overlap with any other collider(or trigger) and when this happens, we may run a function.
We use OnTriggerEnter, OnTriggerStay and OnTriggerExit methods to detect overlapping and to start events.
Here is an example that shows how we use them:
public class TriggerExample : MonoBehaviour
{
    private void OnTriggerEnter(Collider other)
    {
        Debug.Log("An object entered.");
    }
    private void OnTriggerStay(Collider other)
    {
        Debug.Log("An object is still inside of the trigger");
    }
    private void OnTriggerExit(Collider other)
    {
        Debug.Log("An object left.");
    }
}
In the script above, OnTriggerEnter, OnTriggerStay and OnTriggerExit methods will run when an object that has a collider enters, stays and exits the volume of the trigger.
Observe that Trigger methods take a parameter in the type of collider. If you want to detect the names, tags or any other property of an overlapping object, you can get them using this parameter. Here is an example of this. The following will print the name of the object that interacts with the trigger.
private void OnTriggerEnter(Collider other)
{
    Debug.Log("Name of the object: " + other.gameObject.name);
}
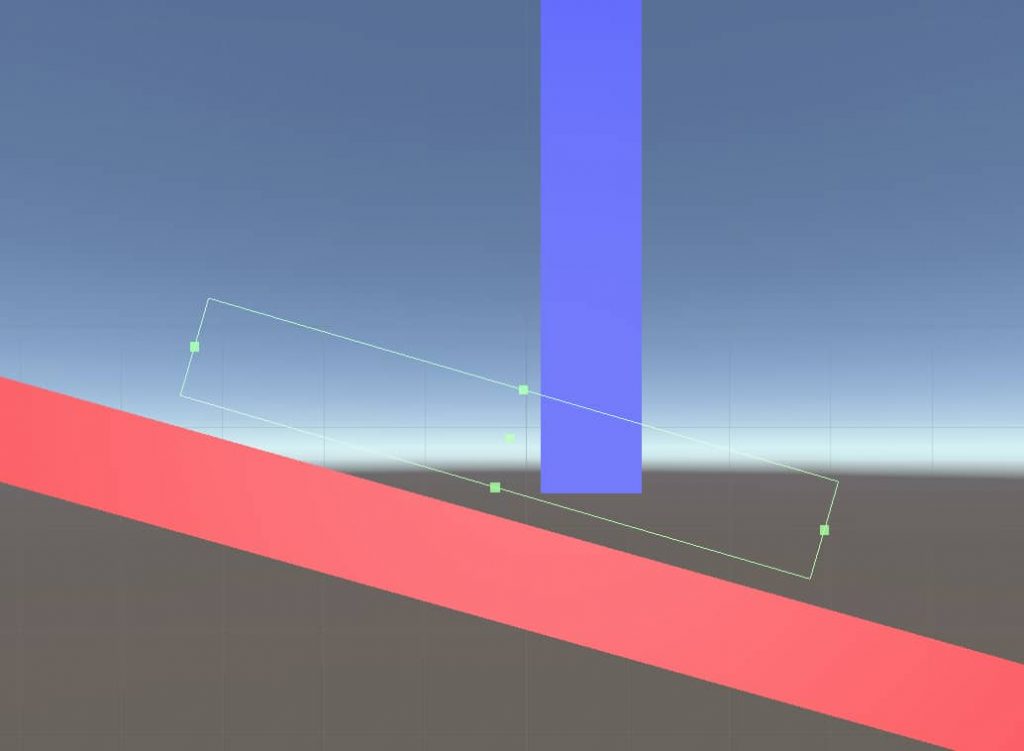
Let’s create an automatic door as an example. To do this, create a cube and disable its Mesh Renderer component since we do not want to see it. Then make the collider of the cube trigger. You should also create an object for the door(blue object, see below). Your configuration should look like this:
We will set a boolean variable true that is in the script that is attached to the door when an object enters the trigger to open the door. And when an object left the trigger we will close the door by setting the same variable as false. The following is the script that should be attached to the door:
using System.Collections;
using System.Collections.Generic;
using UnityEngine;

public class DoorScript : MonoBehaviour
{
    private bool open = false;
    private Vector3 initalPosition;

    public bool Open { get => open; set => open = value; }

    private void Start()
    {
        initalPosition = transform.position;
    }

    void Update()
    {
        if(Open){
            transform.position = Vector3.Lerp(transform.position, initalPosition+new Vector3(0f, 2f, 0f), 5f*Time.deltaTime);
        }else{
            transform.position = Vector3.Lerp(transform.position, initalPosition, 5f*Time.deltaTime);
        }
    }
}
And this is the script that needs to be attached to the trigger:
using System.Collections;
using System.Collections.Generic;
using UnityEngine;

public class DoorTriggerScript : MonoBehaviour
{
    public DoorScript door;

    private void OnTriggerEnter(Collider other)
    {
        door.Open = true;
    }

    private void OnTriggerExit(Collider other)
    {
        door.Open = false;
    }
}
You should also assign the door game object to the DoorTriggerScript.

And this is the result:
Layer Collision Matrix
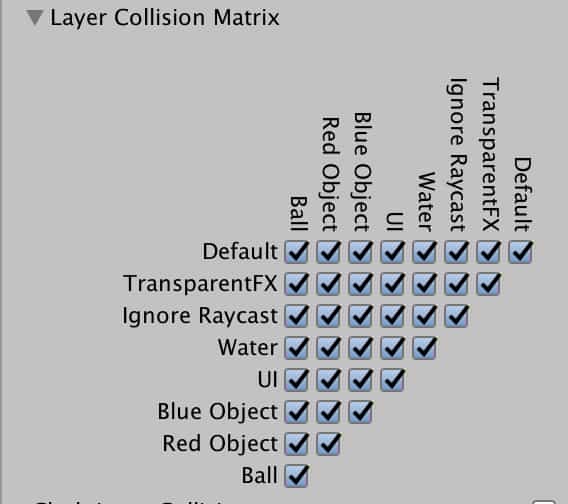
In your games, sometimes you may avoid collisions between certain objects. We can determine which objects can collide with another object based on their layers using the layer collision matrix. The layer collision matrix is located under the Physics Tab in the Player Settings.
In the layer collision matrix, ticked layers can collide. If you want to prevent two of the layers collide each other, you have to untick. Let’s see how to do this.
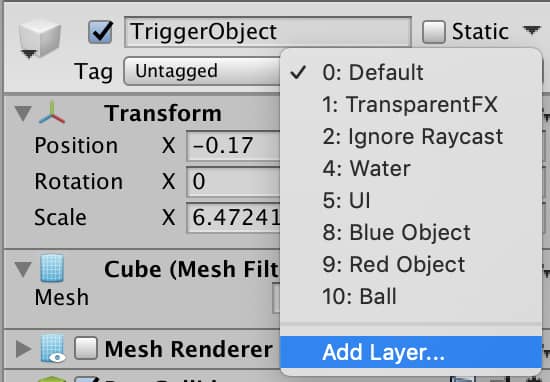
Assume that you have blue and red objects and a ball. If you untick the checkbox of the ball and red object layers, objects that have those layers cannot collide anymore. In order to add layers, click on the layer dropdown menu of any object and select Add Layers.
Then you can add new layers in that section.
If you like this article, you may take a look at our other articles or tutorials. To see them click here.

Very nice and helpful tutorial!